Clicky

Lava Lamp No More

Tuesday, December 27, 2011

So we had big plans to get all kinds of things done on our house in the first few months, but life has been crazy busy. We did a lot of traveling for Thanksgiving and will have gone out of town 3 times in the month of December, so not much progress has been made on the house front. Also when it's cold outside I just want to sit on the couch, drink hot chocolate, and cuddle with the Mr. Flufferson. Winter is not good for my motivation, apparently. Oh, and this is Arielle, not Andrew. He doesn't really cuddle with the cat. ;)

We did manage to get a few projects done in the month of November. Here are just a few of them. First, Andrew scraped the ceiling in the guest bathroom. Lucky for me we decided it was too small to have two people scraping at once! (No picture of that, because there's really nothing to see).

 He also built stairs for the garage and I painted them with a gray floor paint. Previously we had one very narrow stair that was a really awkward height. Andrew built stairs with the normal specifications so now I can walk into the house without tripping up the "stair"!


My favorite change is the new light in our hallway that's actually bright! The old light was just a little too "wannabe lava lamp" for me. Also, it was orange, hence orange light. Blech. But the new one is a cute Allen Roth fixture (technically an outdoor light, but it was the only one we liked). And it was on clearance for $29.99! Yay!


These are just minor changes, but hey, progress is progress. We've also been very distracted by a BIG project that we're planning for the new year that has recently moved up on the priority list. More details to come soon!

Read more...

Master Bedroom Inspiration

Wednesday, October 26, 2011

One day as I was browsing Pinterest I came across a picture of an interior sliding "barn" door. I fell in love with this idea and thought something like this would be a great feature in our master bedroom between the bedroom and the walk-thru closet. These were my two favorite pictures.


Source: Design Sponge

I started looking around and at first thought the hardware would be simple, but we'd struggle to find a door. Wrong! It turns out the specialty hardware kits for hanging sliding doors cost about $400! I looked and looked online for a cheaper place to buy them, including farm and stable supply websites, but couldn't find them any cheaper. Local hardware stores don't carry this type of hardware at all. 

I had seen some more industrial looking box rails, but I was skeptical until I came across these pictures. 


I really like the look of this hardware, too, and I most definitely prefer the price. So yesterday we went to our local Do It Best hardware store and picked up an 8' box rail along with the hardware needed to hang the track and attach the door. The total for the track and hardware came to $92. Yay! Still not super cheap, but understandable for a bunch of pieces of steel, and I was so glad to be done with my search for the hardware. Now to do the real work and hang the door!

Read more...

Mr. Fluffy Flufferson

Tuesday, October 25, 2011

We would like to introduce you to the newest member of our family, who also happens to be the fluffiest member of our family. We call him Chaucer, but he also answers to Mr. Fluffy Flufferson and "Hey, Mr. Kitters!" As my sister would say, "He's especially cute when he's orange!" :) We think he's about 2 years old, and he definitely has some maine coon in him.

We adopted Chaucer a little over a month ago and he's adjusted really well to living with us. He spends a significant amount of his time scoping out surprising places to sleep and then sleeping in them. Here he is sleeping in a drawer.


I've also found him sleeping in the linen closet and under the sink in the master bath. Here's Mr. Kitters sleeping in a laundry basket full of dirty clothes. He even stayed in the basket while I carried it to the kitchen. Silly boy.


Chaucer also enjoys sitting on your lap and will just sleep and purr for hours. His other interests include hunting for treats, playing with peacock feathers, running through his crinkle tunnel, chasing a laser pointer, and meowing loudly when no one's paying attention to him. At night he loves to play with feet under the covers. Generally he's very graceful which makes this video where he he slid backwards off the bed doubly entertaining.


No kitties or feet were harmed in the making of this video. 


Read more...

Is That a Yard or a Jungle?

Tuesday, October 4, 2011

After the house tour, we wanted to introduce you to the landscaping that was left by the last owners. In all fairness to them it did go untended for almost 9 months during the selling process. By the time we got to it there were several dead bushes and trees, but also a few gardens in not so typical places.

Front Yard from Right Side
Front yard from the right side
So nothing really of note here, you may see the raised flower bed that is right in front of the trailer our roofers used. Yes, there was a raised flower bed in the middle of  the front yard. We have since removed the boards surrounding it, but have yet to completely level it with the yard.

Front Yard from Left Side
Front yard from the left side
On the left side of the house were two dead trees and a garden with kohlrabi and cabbage. While we're all for gardening vegetables, we prefer not to have them in our front yard! You can also see one of the dead, burnt bushes in front of the house.

Back Yard from Left Side
Back yard from the left side
We probably don't mention to guests enough that this chaos is going to change for sure. The previous owners added dirt to make a raised level in the back yard and put in a retaining wall...that doesn't retain much. Unfortunately they did not consult a professional as the grade is not away from the house, but towards it (meaning water runs towards our house instead of being directed around). So we'll need to fix that to avoid water going under our house long term. Besides that, it's kind of a jungle.

 Back Yard from Right Side
Back yard from the right side
Here is the other side of the back yard. There is lots of clean up to do, and we still aren't sure how we are going to restructure it when we remove the retaining wall. Also, you can see the lovely color of red they painted the deck. Hopefully it doesn't stay red for too long!

Read more...

First Major Crisis!

Sunday, September 18, 2011

So far, our adventures in home ownership had been fairly calm and about what we expected...until last week. About a week and half ago I was walking into our kitchen and noticed that the floor felt different in one specific place. I pointed it out to Andrew, along with a new crack in the linoleum that I'd never seen before. The difference wasn't incredibly noticeable, so I think Andrew thought I was crazy. But hey, I'm a detail person. I notice these types of things! I should have investigated it further, but figured I was probably just being paranoid.

Then 4 or 5 days later, I saw this in our living room:

Water Damage 1

I instantly started freaking out, saying I'd never seen that before. I knew something was wrong. Andrew tried to calm me down, saying that it was probably there before and I just didn't notice. I knew I would have noticed something like this the very first time we looked at the house. Then I asked if he'd looked behind the refrigerator lately (it's directly on the other side of this wall). Well, obviously this is a stupid question. Who just randomly decides to look behind their fridge? 

Thanks to Andrew for immediately rushing to the fridge and pulling it out without hesitating to call me out on my dumb comment. Sure enough, he found water. The fridge water line had been leaking since we hooked it up 3 weeks ago. I started panicking even more, rendering myself completely useless. Lucky for me, Andrew seemed to know exactly what to do. He unhooked the water line and then pulled off the trim at the bottom of the built-in shelf and found standing water. He shoved rags under it and then took apart the shelf so he could pull out the bottom piece. We soaked up all the water and then put rice down to soak up any more. We also put a fan on it.

Water Damage 2


The next day Andrew made the decision to pull up several pieces of the wood. As he did, we realized he'd made the right decision. The pieces were soaked and would have taken weeks to dry out. He pulled out as many pieces as he could and then pried the rest up with a flat bar. We kept the fan on it for at least another 24 hours.

Water Damage 3

After we got all of that taken care of, Andrew looked in the bottom of our pantry (which is right next to the fridge) for water. He didn't find much, but he did find a bean that had fallen down into the corner near the fridge. It had begun to sprout. If only we'd looked there sooner we would have known something was weird. Haha...

I'm happy to report that now, 5 days later, the sub-floor is dry, the wood seems mostly dry, and the cracks have lightened up significantly. We haven't really seen any signs of warping, but now we're struggling with how to get all those pieces back in as tightly as they were before. Also, we took apart the shelf and ruined the drywall on the corner of the wall. Oh well, I guess we were going to get rid of that shelf anyway! 

I think it's safe to say that for now we've averted any major crises. It was definitely not the best introduction to home-ownership, though!

Read more...

New Washer & Dryer

Our first project in our new house was our laundry room. We thought we were done with it only to discover that our dryer wasn't working. So we bought a new dryer on Craigslist for $50.

Unfortunately, the washer broke a few days later. The broken piece would have cost over $100...We flip-flopped back and forth between buying just a used washer or a used set. Somewhere along the way the idea of a new set was thrown in and was just as quickly discarded when we looked at some new sets and saw that the machines cost upwards of $600 each. Yikes...and those weren't even the nice ones. (Some front loading sets were around $1000 total, but for reasons I won't go into here I was not going to get a front loader.)

After more searching on Craigslist, we found an ad for a 4 month old Kenmore Elite washer (top loading!) and dryer set. They were listed at $1500, but Andrew got them down to $1100. This model currently runs about $1250 per machine, or $1000 on sale. We figured a 50% discount was cheap enough to make these a good deal. Also it comes with a 1 year parts and labor and 10 year power drive warranty. (Not sure what all that means, but apparently it's good) The sellers happened to be moving that night, so they delivered them in their U-haul. Don't they look so pretty in my laundry room?

New Washer and Dryer

I'm still figuring out how to use them. You don't set the water level cause it measures that on its own. No more guessing what size my load is. :) They both have over 10 normal settings plus "add-ons" like stain treat, extra rinse, save energy, wrinkle guard, static shield...They both have sanitize settings, and the dryer even came with a steam shelf! Another plus: the washer is huge! I put a load in the other day and it looked empty, so I picked up another load and tossed it in, too. It still wasn't full - 4.5 cubic feet and no agitator to get in the way. But don't worry, the bottom of the drum spins and "agitates" in a less destructive way. ;)

All that to say that I am very pleased with my new washer and dryer. :) Now hopefully these last us a long time! 

Read more...

House Tour

Thursday, September 15, 2011

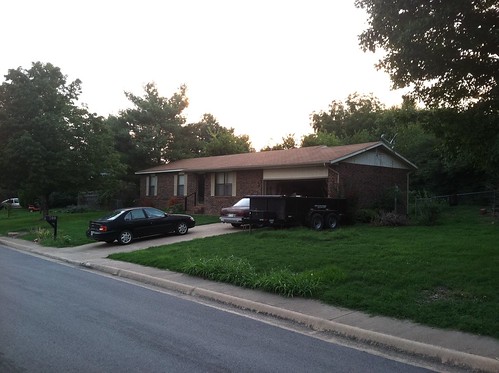
Now that we're feeling a little more settled in our new home, it's time to upload pictures of its current state! Not everything is moved in yet (as is obvious from the pictures of the garage), but we've made some progress. We're sorry for the poor quality of the photos, as all we currently have are the cameras in our iPhone 4's. So without further ado, here's our house. :)

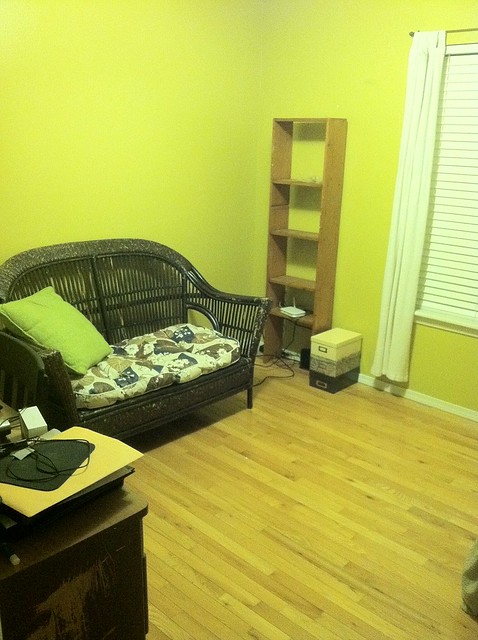
Living Room/ Entry Way

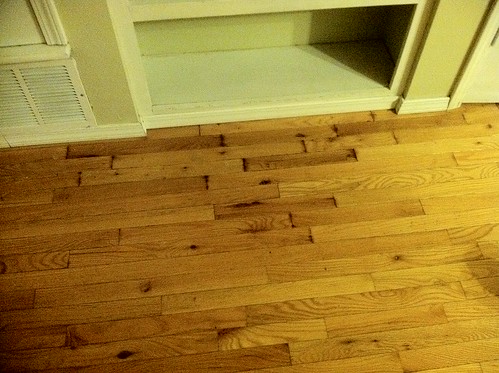
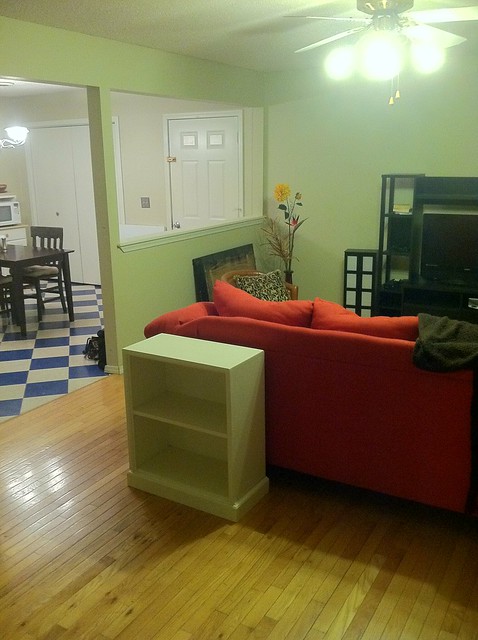
So the element we are probably least happy with in this house is the lack of an entry way. It is pretty much untouched at this point, and we're not really sure how to make it feel more entryway-ish. The white shelf (the one that looks yellow because of the lighting) is not staying there, but is probably going to end up in the office. Andrew scored that at the neighbor's garage sale for only $20! Woot! On the left side of the picture you can see the back of our new bed frame for the master. Yay!

Living 1

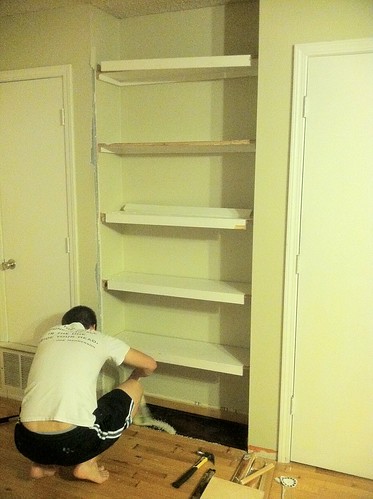
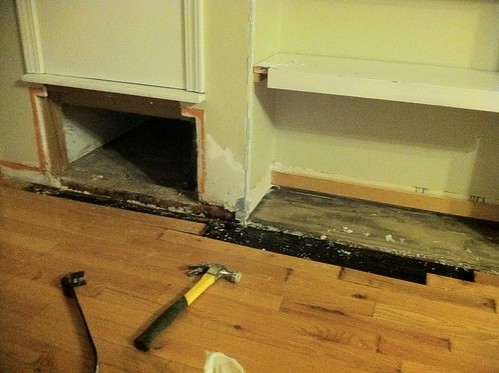
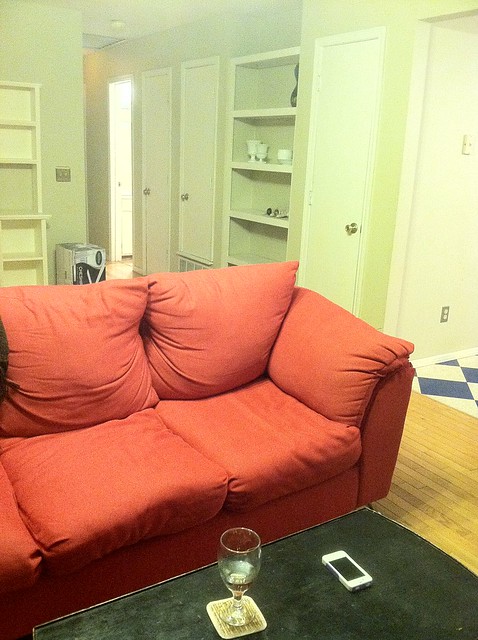
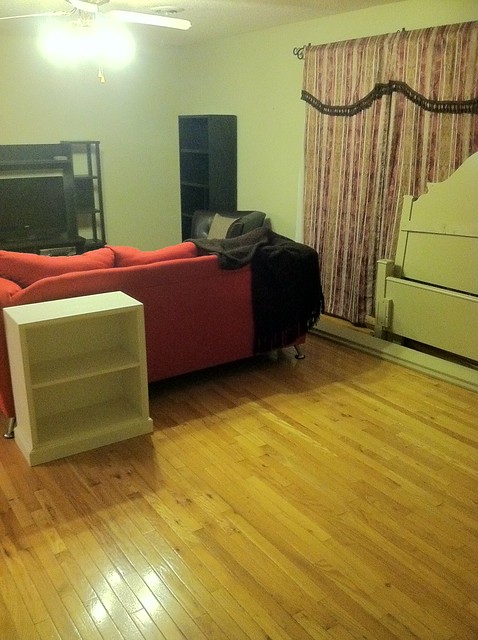
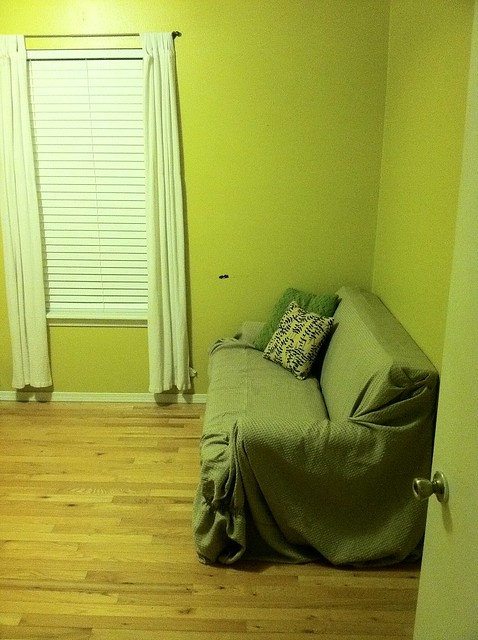
This shot shows the area right next to the entry way, the hallway, and our poor, sad couch. :( There is a "lovely" built-in shelf that we may eventually take out to make more room for the fridge which is directly on the other side.

Living 2

The opposite end of the living room, the entrance to the kitchen, and the half wall separating the eat-in area from the living room...

Living 3

Last corner of the living room...and the wonderfully...awful curtains that the previous owners left for us. But hey, for now they block out the sun and help keep our house cooler, so we can't complain too much. 
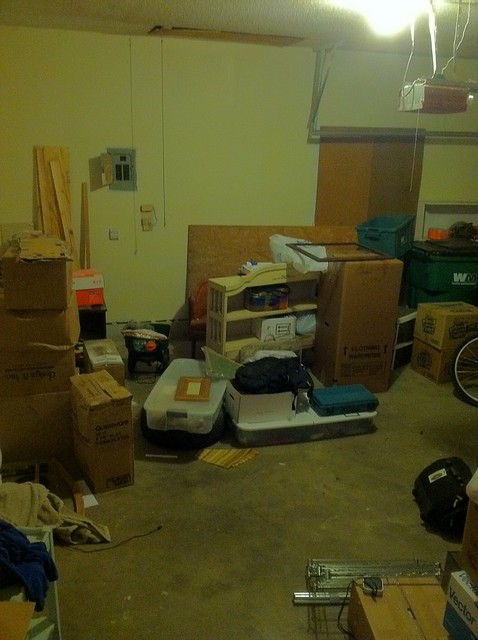
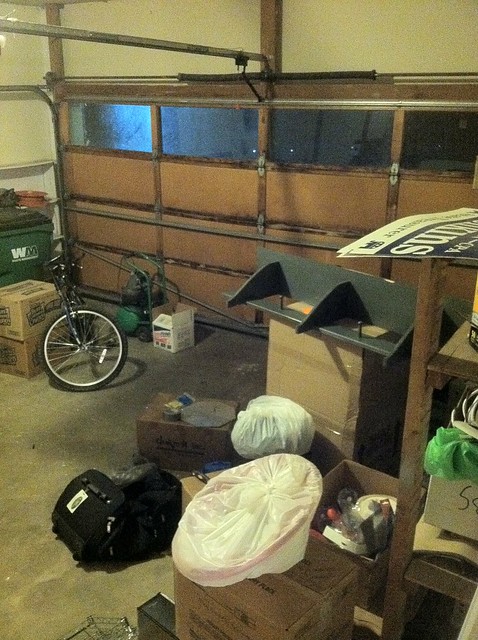
Living 4


Garage


This is our garage. We haven't tried pulling both cars in yet since we have all our boxes out there, but supposedly it's a 2 car garage so hopefully they fit! Obviously we still have a lot of stuff left to bring inside and unpack, but we're getting there.  
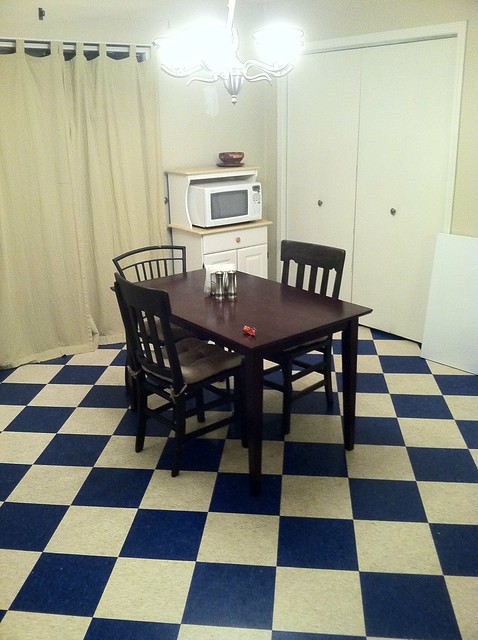
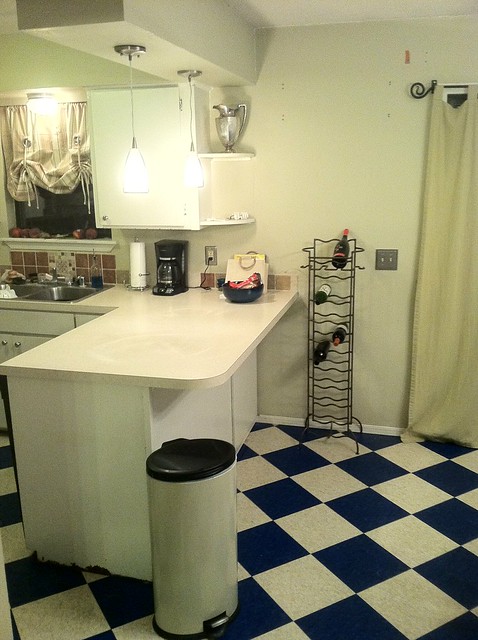
Garage 1

Garage 2


Kitchen


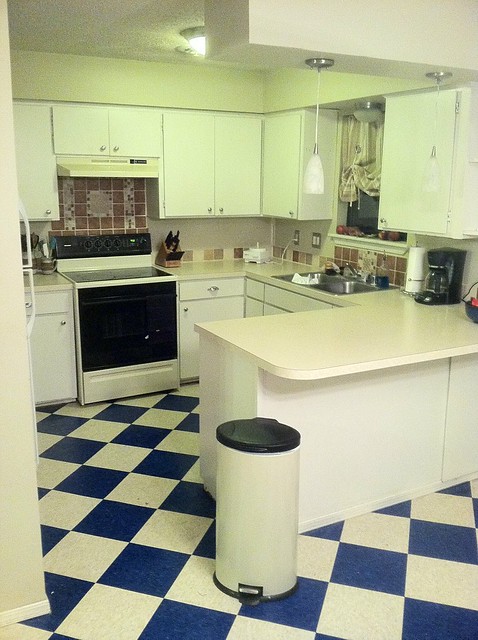
This room is going to be the biggest and most expensive project, but we're really excited for the possibilities! 

Kitchen 1

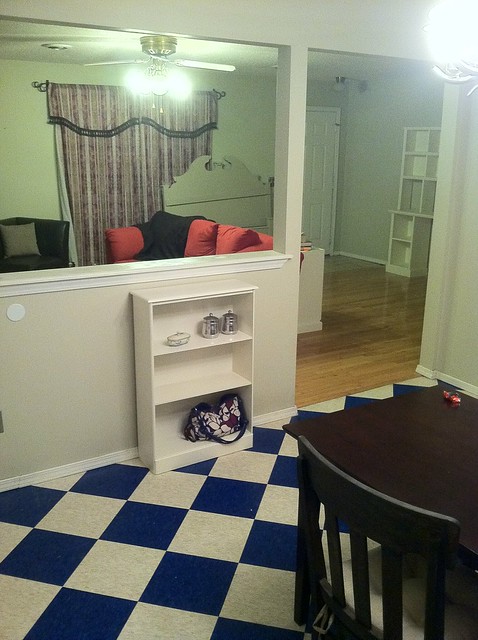
Our favorite feature is, of course, the bright blue and white checkered linoleum tiles. Yes, they are individual tiles! Gross! But we can't replace those until we redo the whole kitchen as we'll be getting rid of that oversized peninsula, so we're going to live with it for a while. 

Kitchen 2

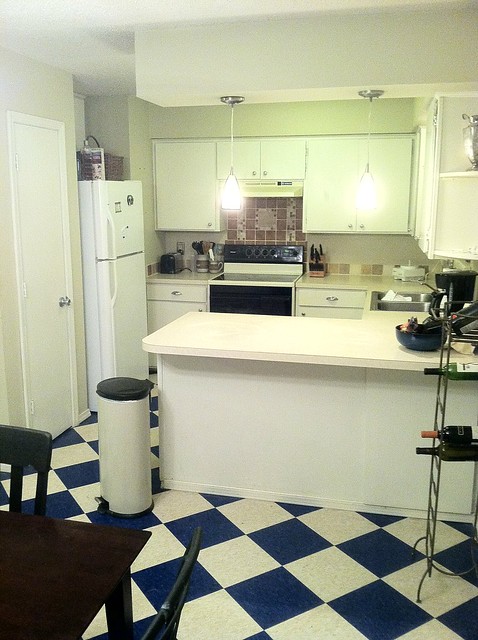
This is our eat-in area, and the doors to the deck and doors to the laundry closet are behind. This space is about 12 feet by 12 feet, so our table looks pathetically small for the space. 
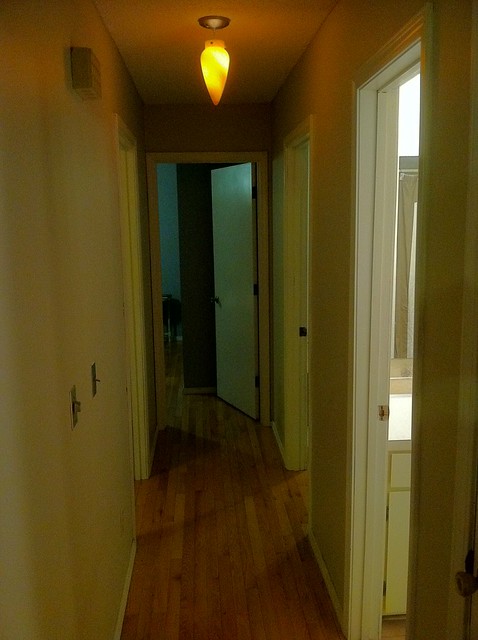
Kitchen 3

Kitchen 4

Kitchen 5


Hallway

This is our long, narrow hallway. Don't you love our "upside-down lava lamp" light fixture? It's got to go, not only because it's hideously ugly, but also because when turned on it only manages to cast an eerie red glow over everything without actually making the hallway any brighter. It's not really fulfilling its duties as a light fixture...

First door on the right is the hall bath, and next is the master bedroom. The door at the end is the guest bedroom, and the door on the left is the office.
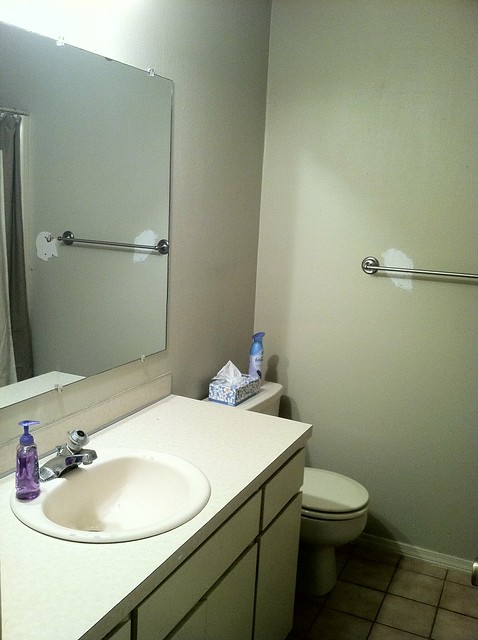
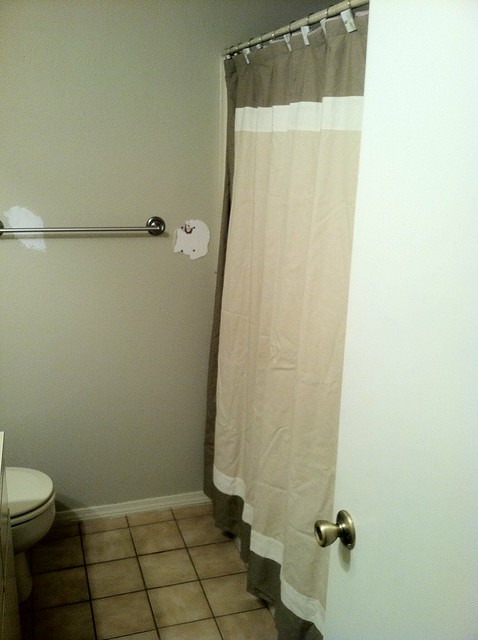
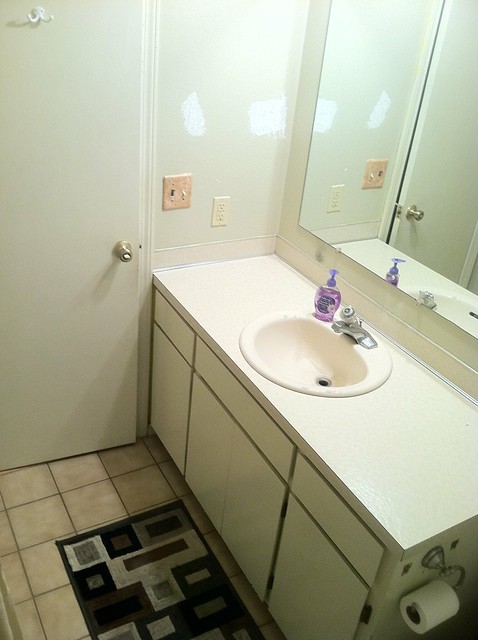
Hall


Hall Bathroom


This room needs a lot of help, too. The popcorn ceiling is peeling, the painted-over wallpaper is peeling (that is not going to be fun), the tile is hideous, and everything is original to the house (a.k.a. outdated). Blech.
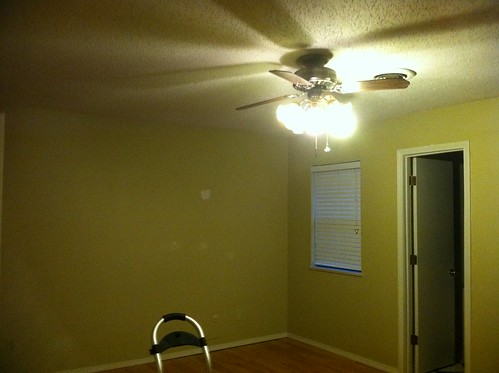
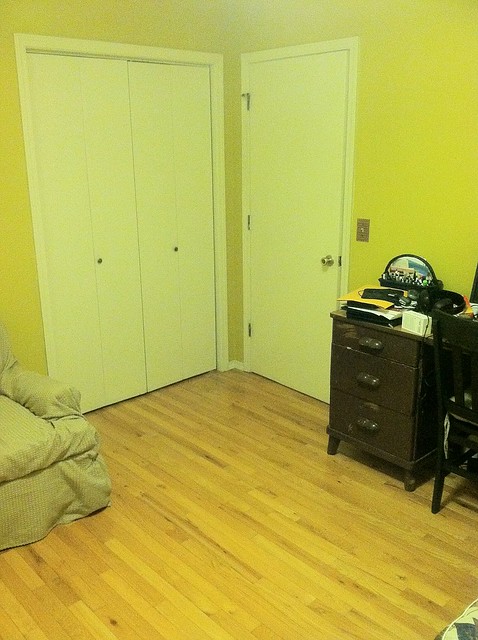
Guest Bath 1

Guest Bath 2

Guest Bath 3


Office


The office is a little lower on our priority list, but honestly will probably get done before kitchen and bathrooms. All we really have to purchase for this room is some paint and a new light fixture. I'm thinking gray walls. :)
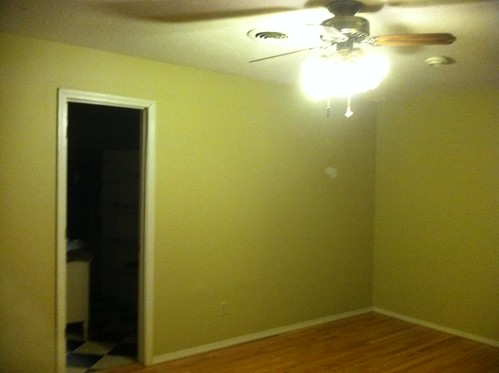
Office 1

Office 2

Office 3


Guest Bedroom


Currently we're sleeping in the guest bedroom while we redo the master, hence the furniture. But once we're done with the master, this room will be empty! :( Hopefully in the next few months we'll get a bed for it. :) As far as colors, I like the idea of a light, fresh green, but feel like maybe I need to do a bolder, richer color.

Guest Bed 1

Guest Bed 2

We think it must have been a kids room before from the stars on the ceiling and the mirror nailed unusually low on the wall...a kid that needed to look at himself in a full-length mirror apparently. Yeah, that mirror will NOT be staying there for long. 
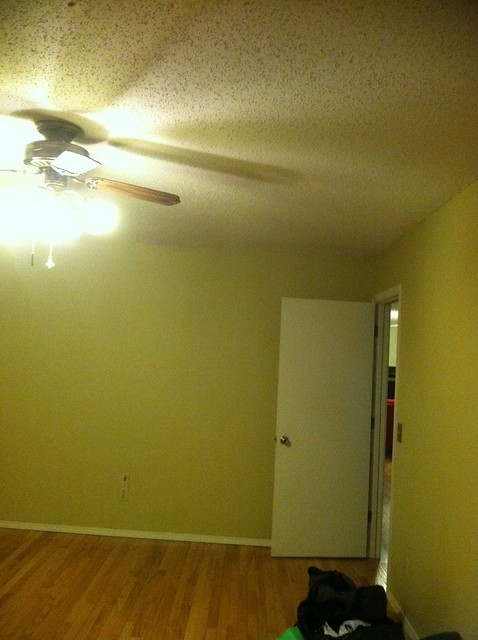
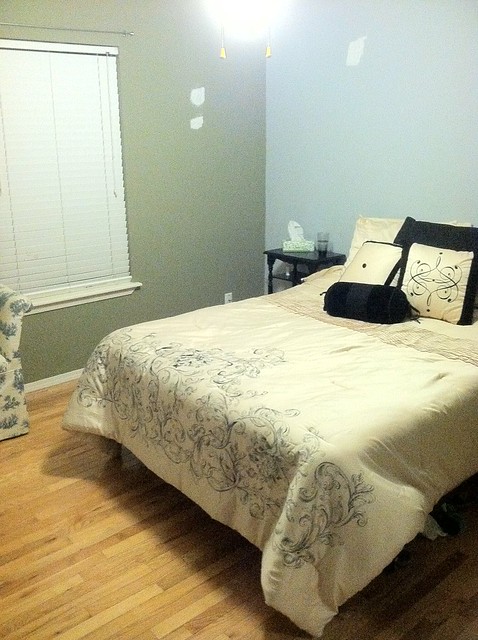
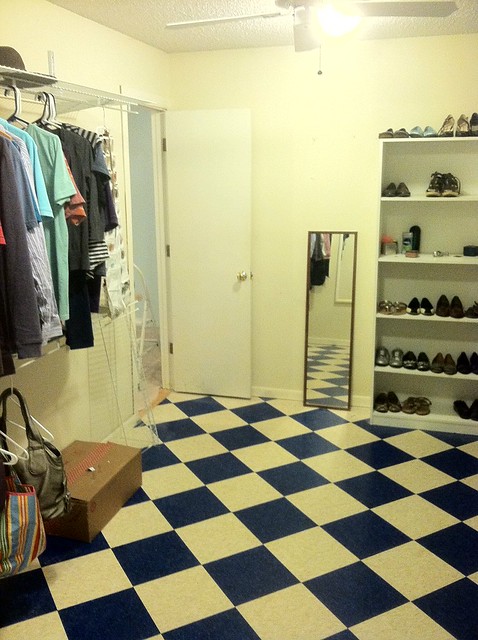
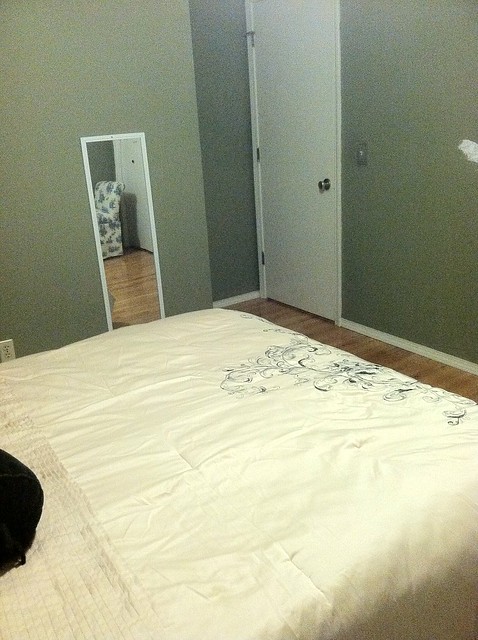
Guest Bed 3


Master Bedroom


The master no longer looks like this, thank goodness! Hopefully by this weekend we'll be done with it and then upload the "after" pictures. Disclaimer: "Done" is relative. We'll be done for now, but it's not necessarily going to be completely decorated. We still need to decide on a light fixture and a few other accessories.

Master Bedroom 1

Master Bedroom 2

Master  Bedroom 3


Master Closet


This is the master "walk-thru" closet and my favorite room! This truly is what sold me on the house. How could you not love the possibilities? We've done the measurements, and this room really is 100 square feet. Some might say it's a waste of space. I think those people are crazy. :)

Master Closet 1

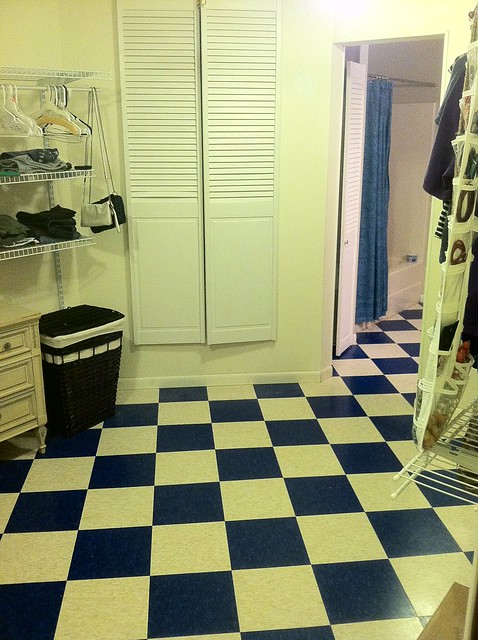
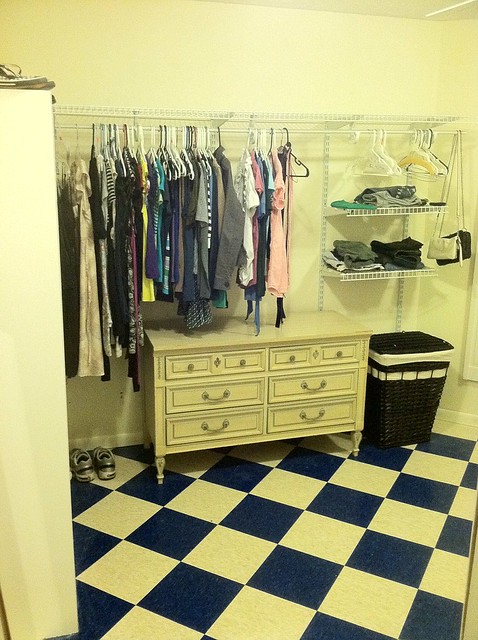
Obviously the space is not being utilized in the best possible way and the floor is the same hideous tile as in the kitchen. For now, though, it's serving it purpose just fine. (And no, that is not my entire wardrobe. I have four or five boxes of clothes in the garage that have yet to be unpacked. Yikes!)
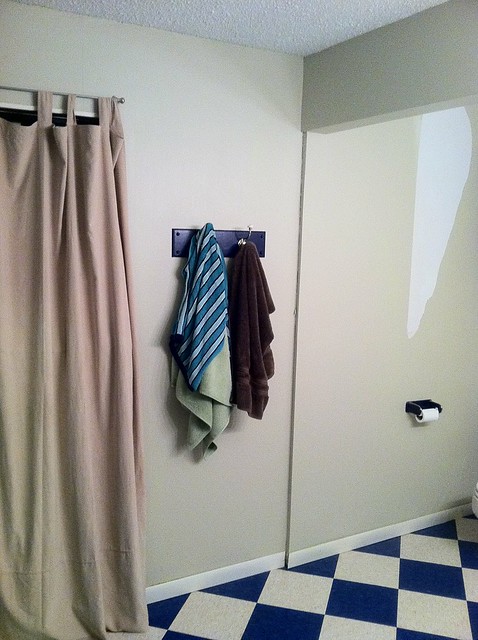
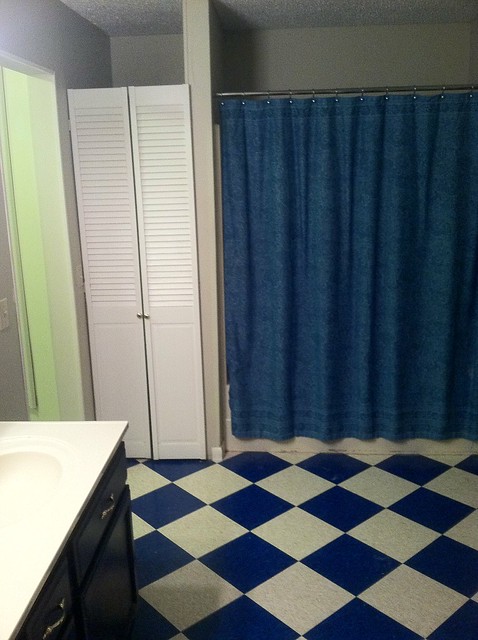
Master Closet 2

Master Closet 3


Master Bath

This is the room I'm most unsure about. It's a very large space, but everything you could possibly need in a bathroom is already there. What does that leave? Two toilets? Probably not. Bidet? Jetted tub? Definitely not those either. So I'm left with a really large bathroom and nothing to put in it. 

Mater Bath 1

The only things I do know about this room are the following:

1. They painted over wallpaper. Again. That sucks for us.
2. I want a longer vanity than the one we have now. With the two sinks there really isn't much counter space.
3. THE FLOOR HAS GOT TO GO! It's starting to make me dizzy.

Master Bath 2

Oh, and really? A blue floor, blue cabinets AND a blue shower curtain? Who thought that was a good idea? Too much blue for me!

Master Bath 3

So there's our house (minus the laundry closet which is in a previous post). We have a ton of work ahead of us, but we really think the house has good bones and amazing potential! It may not be pretty yet, but it really is starting to feel like home. It grows on me a little more every day. Now all I need to make it complete: a kitty! 

Read more...

Our First Project

Monday, September 5, 2011

Since we knew we wouldn't want to change the laundry room after putting the machines in, we decided to tackle it as the first project in our new house. We started tearing the nasty, peeling shelf liner off  the shelves as soon as we moved in and unfortunately never got a before picture with it on. You will note the awful blue and white checkered tile that is in our kitchen, but don't worry, we will get to that!
Before
After dismantling the shelves we found that the previous owners had used dry wall anchors and then pulled them out so our "quick" project was going to take a bit more work than expected.

Oh no! Holes in our wall!
After running to Lowes to pick up some mud, we proceeded to make the holes even bigger!
Hope we can fix this!
While I worked on the drywall repair Arielle got to work refinishing the shelves. They had a layer of adhesive shelf liner over a layer of wallpaper that had to be scraped off. Then she painted them with an antique white paint that we already had.
That floral pattern had to go.
Even though I have seen a lot of mudding done, I really had never actually muded myself. The truth is, the experts are good because they practice a lot. It is very difficult. The practice in this room was good because most of this work will be hidden. After scraping and painting the ceiling, repainting the room, and adding an updated flush mount light fixture ($10.00 at Lighting Emporium on super super super clearance) we were ready to add a touch of style with these fantastic and cheap pulls.


After all of the work was done, we realized we needed a gas shut off to hook up our dryer. It took three trips to Lowe's, tightening the bolt instead of loosening it (for 5 minutes), and a small hole in the sheet rock near the trim to attach the shutoff so we could connect our dryer, only to find out it wasn't working! They had been in storage for a year, and it made a loud rattling noise when burning gas. We decided not to risk setting our new home on fire, and found a used one on craigslist for $50.00. Here is the finished product:

After

We were lucky enough to find a dryer of the same brand as our washer. They are almost a perfect match, and it's far better than our old, rusty dryer. The total cost of this project (without tools- hey we're new homeowners and we had to purchase a few we didn't have) was $92.47. Here is a break out of how we spent it:

Paint: $10.97 (we bought flat and we have a whole gallon, so we can touch it up whenever there is a scratch or spill, but since it is a laundry room perhaps we should have done satin or semigloss)
Ceiling Paint: $3 (We bought a whole bucket for the rest of the house $49, approx)
Lumber for new shelf joists: $5.18 (two 1x2x8' used about half of it, there is more for other closets in the house)
Sheetrock: We used the extras that were in the garage! Free!
New Light Fixture: $9.97
New Door handles: $2.44
Gas Shut off valve: $7.97
Gas Flare Joint Hookup: $1.12
Thread Seal Tape for gas joints: $1.07 (for whole roll, will use forever)
Dryer: $50
Mud Joint Tape: $.25 ( $1.55 for a role that will use forever- although in retrospect i recommend the self adhesive kind)
Drywall Screws: $.25 (unfortunately you cant just buy the 5 or 6 you need so we bought a box $6.47)
Masking Tape: $.25
Mud: We bought a bag for $7.98, but we used some leftover from the previous owner in the garage for this project.

Total:$92.47
Total without Dryer: $42.47


Here is a list of tools we used, and which ones we had to buy:

Hammer
Cordless Drill
Screwdrivers 
Pliers
Pipe Wrench
Drywall Saw ($9.98 at Lowes)
Skill Saw($10 at garage sale- used to cut shelf holders, but you could use a handsaw)
Skill Saw Blade($5.38 again you could use handsaw)
Goggles ($5.94 at Lowes for 2 pairs- but we will use them for the whole house as we scrape ceilings!)
Trowels and Mudbucket ($7.98)
Laser/Level($14.97 a must for hanging the shelves straight, although you could use a chalk line as well)
Paint Brushes
Paint Pad ($6.00)
Paint Pad Tray($1.74)

We really enjoyed our first project. We certainly have acquired quite a collection of tools, but they will continue to be useful as we fix up the rest of our house.

Read more...